

Sod Installation Guide: How to Lay Sod
Discover how to use sod and the transformative world of sod installation in landscaping. Sod is an option for homeowners and businesses. It's used to instantly enhance an outdoor space. However, it comes with a list of pros and cons. The immediate aesthetic allure that sod brings to your surroundings is amazing, but not always budget friendly. Another option is to learn about the affordable and innovative technique of hydroseeding, a revolutionary approach challenging conventional norms in lawn establishment. Sod provides immediate results, however hydroseeding provides strong roots and resilient landscapes for long lasting results year after year. Maximize your landscaping potential with hydroseeding innovation at its best.
Preparing for Sod Installation
Assessing the Area
In the meticulous prelude to installing sod, a thorough area assessment becomes paramount. Examine the slope and topography, strategically identifying potential water runoff challenges for effective drainage solutions. Prioritize safety by examining the presence of underground utilities to prevent disruptions during sod installation. Delve into nuances of sunlight exposure and shade patterns, crucial for selecting the right sod variety for optimal growth. Recognize existing landscape features, like trees or structures, and strategically plan around them. A comprehensive assessment forms the bedrock for a successful venture in installing sod, addressing potential issues and ensuring a harmonious and thriving outdoor space.
Removing Existing Vegetation
In the transformative journey of laying sod and installing new sod, the steps in removing existing vegetation are crucial. Prioritize eco-conscious practices by utilizing environmentally friendly herbicides or organic methods for effective weed control. Clear the soil surface of rocks and debris, ensuring a smooth foundation for the imminent sod layer. Employ a sod cutter for larger areas, expediting the removal process. Thoroughly inspect the cleared area for hidden debris or remnants, preventing future issues during the laying sod and installing new sod phases. This detailed approach ensures the groundwork is pristine, setting the stage for a seamless and vibrant transition to a newly sodded landscape.
Soil Preparation
Achieving a healthy lawn starts with soil preparation before new sod installation. Combat soil compaction effectively by aerating the soil, promoting optimal root growth. Enhance soil structure and fertility by incorporating well-decomposed organic matter, fostering a nutrient-rich environment. Tailor the soil texture as needed, adding sand for improved drainage or clay for enhanced moisture retention. Execute precise nutrient amendments based on a comprehensive soil test, ensuring the perfect balance for robust plant development. Learn more about how to prepare soil for planting and empower your landscape with a solid foundation for the lush and healthy growth when laying sod.
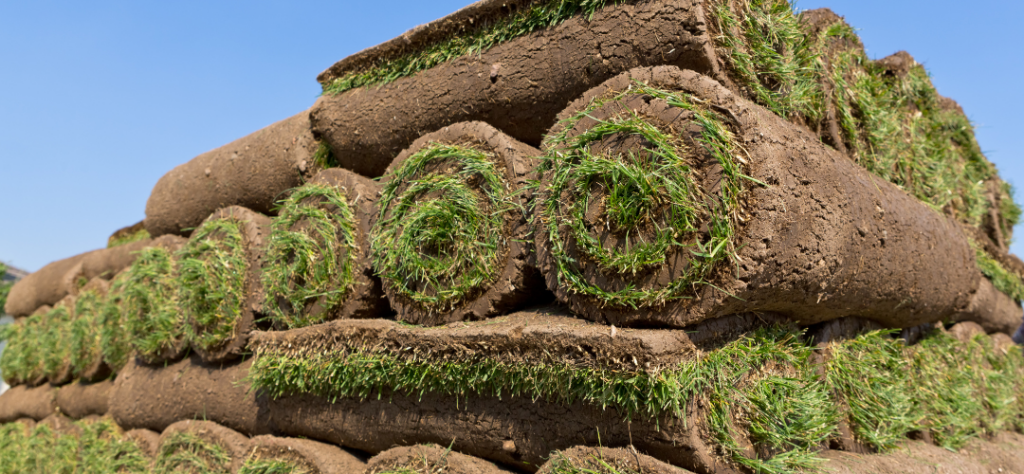
Choosing the Right Sod
When researching into the world of laying down sod, a variety of options awaits, each with its unique characteristics. Bermuda, Zoysia, Fescue, and Kentucky Bluegrass are popular choices, catering to diverse preferences and requirements. Canadian climates demand careful consideration, prompting a discussion on the suitability of cold-tolerant varieties like Kentucky Bluegrass and Fescue. These sod types exhibit resilience against temperature variations and potential frost, ensuring a vibrant lawn throughout the seasons. It's important to note that sod varieties vary in cost, making it essential to choose one that aligns with your budget while meeting your landscaping needs.
The adaptability of sod extends beyond climate considerations. Certain types flourish across the diverse climates of Canada, from the north's harsh winters to the south's milder conditions. Other lawn installation options that are more budget friendly include hydroseeding. Hydroseeding emerges as an innovative option, offering advantages such as rapid establishment, uniform coverage, and suitability for various terrains.
To navigate this array of choices effectively, consulting local nurseries or landscaping experts is recommended. Assessing factors like area size, climate, and desired timeline becomes paramount. For lawns anticipating heavy foot traffic, opt for a durable sod variety renowned for wear resistance. In contrast, decorative lawns or golf courses benefit from prioritizing aesthetics, choosing a sod type with a fine texture and rich color. Ultimately, an informed decision ensures that the selected sod or hydroseeding option aligns seamlessly with both practical considerations and aesthetic preferences, resulting in a resilient and visually appealing landscape. For further insights on making the right decision, check our guide to overseeding a lawn.
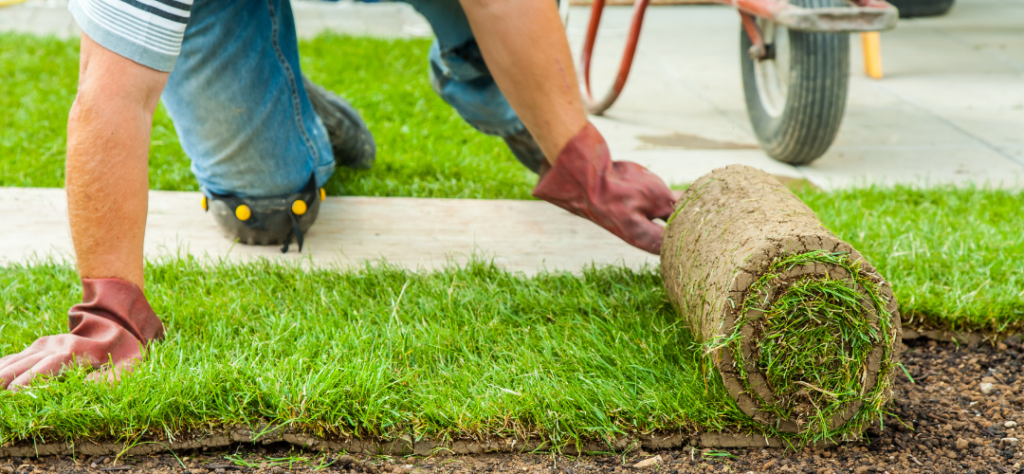
How to Lay Sod Down
Laying sod demands physical effort and attention to detail, but it's a manageable task. Mastering the steps to laying sod involves a learning curve, from soil preparation to precise sod cutting and fitting, along with proper watering and maintenance. Knowing how to lay sod provides flexibility for DIY landscaping projects.
Essential Tools Needed To Lay Sod:
- Sod Cutter: Enables precise cutting of sod pieces.
- Rake: Used for leveling the soil.
- Roller: Helps to compact the sod.
- Shovel: Useful for digging and shaping soil.
- Wheelbarrow: transporting the sod.
- Utility Knife: Ideal for making detailed cuts.
- Lawn Edger: Ensures a neat and defined border.
- Watering Equipment: A hose or sprinkler system.
- Measuring Tape: Ensures accurate dimensions.
- Gloves: Protects hands during the installation process.
1. Preparing the Ground
In preparation for laying new sod, addressing soil moisture is vital, especially in the face of potential frost. Utilize a soil moisture meter or manual inspection to avoid extremes of dryness or waterlogging. Emphasize precise leveling using tools like a rake or shovel to prevent water accumulation and potential winter ice patches. Ensure a smooth, even surface, paying attention to low spots with water collection potential. Effective drainage, considering the freeze-thaw cycle in Canadian winters, is critical. In addition to these considerations, gather essential tools needed to lay sod, including a sod cutter, rake, roller, shovel, and utility knife. This comprehensive approach ensures a well-prepared foundation when you install new sod.
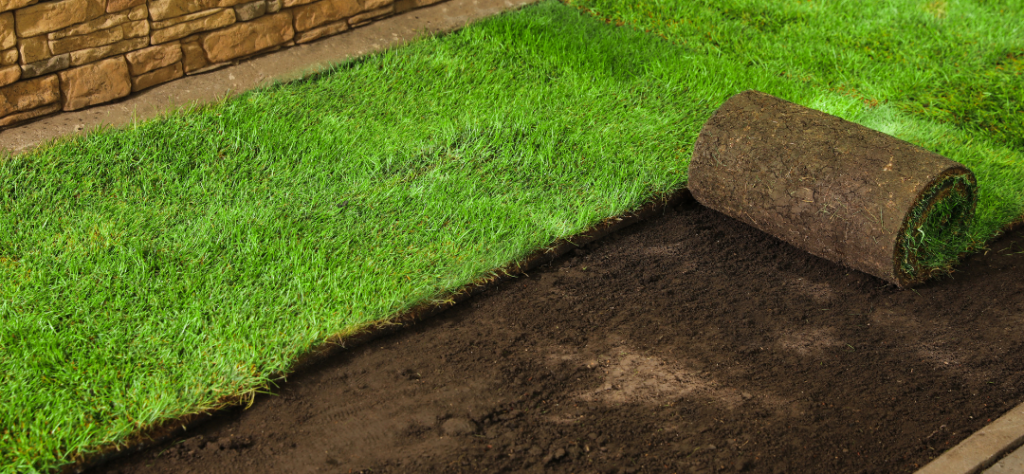
2. Laying New Sod
Choosing the best time to install sod is crucial for optimal root establishment. Planning the process before the ground freezes is essential. Working with frozen ground can present challenges, making installation during milder periods the ideal choice. It's recommended to lay sod down before the ground freezes to promote effective root development. Ensure a snug fit of sod pieces to protect against harsh winter winds. Additionally, securing sod edges is advisable using stakes or landscape staples, especially in preparation for snow accumulation. By strategically considering the best time to lay sod down, you enhance the chances of a successful and resilient installation, fostering a healthy and lush lawn.
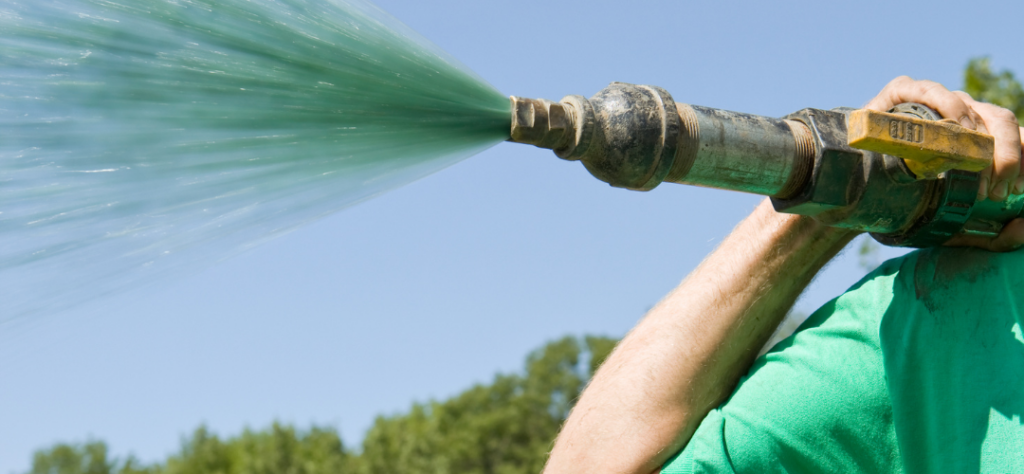
3. Watering and Rolling
Effective watering is vital for winter sod care. Adjust schedules to account for colder temperatures, favoring warmer parts of the day to reduce the risk of overnight freezing. Regularly check soil moisture levels and adapt watering timing accordingly. Proper watering practices contribute significantly to the health and resilience of sod roots during winter. Emphasize the importance of good sod-to-soil contact for strong root establishment. When you install sod, rolling the sod helps smooth irregularities in frozen ground, aiding in this crucial contact. Comprehensive lawn care basics ensure your winter sod care practices align with the best strategies for a vibrant and healthy lawn.
Can You Lay Sod over Existing Grass?
Laying sod over existing grass may seem like a shortcut, but it can lead to various problems. The uneven surface may hinder proper sod establishment, and competition for resources can affect overall growth. Limited soil-to-sod contact may impede root development, and there's a risk of disease and pest transfer. Boldly put, laying fresh sod over an existing lawn is no shortcut and could jeopardize your sod, resulting in double the work. Our team at Liquid Green can prep your soil before embarking on your lawn care journey.
How to Lay Sod over Existing Lawn
Sodding over existing grass, also known as laying sod over, requires meticulous preparation for successful results. Begin by assessing the health of the current grass. Remove it using sod cutters or manual methods, ensuring a clean slate. Clear debris, rocks, and remnants to create a smooth surface for the new sod. Prepare the soil by aerating and incorporating organic matter. Lay the sod on leveled ground with optimal soil moisture. Notably, this process skips extensive soil preparation needed when starting from bare soil, potentially leading to faster establishment. However, one drawback is the risk of competition between the new sod and existing grass for water, nutrients, and sunlight, resulting in a costly battle to replace sod. Careful planning and execution are key for a thriving lawn in the long run.
Tips for Laying Sod
If you're looking to lay sod yourself and minimize sod installation costs, consider the following tips:
1. Use a Sod Knife for Precision:
Opt for a sod knife instead of a standard utility knife. The serrated edge ensures clean root cuts, facilitating smoother edges and better integration between sod pieces, saving on precision tools.
2. Apply a Root Stimulant:
Enhance root development by applying a cost-effective root stimulant or growth enhancer to the soil before laying sod.
3. Soak Sod Rolls in Water:
Economize on water usage by soaking sod rolls for 10-15 minutes before installation. This ensures root hydration during the critical initial phase of establishment.
4. Roll in Multiple Directions:
Invest in or rent a sod roller to eliminate air pockets, ensuring good root-to-soil contact. Rolling in multiple directions creates a smooth surface for mowing, minimizing the need for professional assistance.
5. Avoid Stretching Sod to Fit:
Prevent extra costs by gently pressing sod into place instead of stretching it, avoiding potential shrinkage and gaps.
6. Leave Slight Gaps Along Edges:
Strategically plan and leave about ½ inch gaps along edges, especially against hardscape surfaces. This accommodates growth and prevents sod from creeping onto surfaces, reducing maintenance costs.
7. Monitor for Grubs:
Regularly inspect for signs of grub infestation to address issues promptly, saving on potential sod replacement costs.
By implementing these cost-effective tips for laying sod, you can achieve a successful DIY sod installation while keeping overall costs in check. It is important to note that the risk of sod dying is much higher when done by yourself. This can result in a failed project and an even more expensive bill. Call Liquid Green today to hear about budget-friendly alternatives such as hydroseeding.
Common Mistakes When Laying Sod
Embarking on the journey of sod installation can yield a vibrant and lush lawn, but without proper planning and execution, it's easy to fall prey to common mistakes that can compromise the success of your efforts. One prevalent error is insufficient soil preparation. Neglecting to properly prepare the soil can result in poor sod establishment and hinder root growth. To avoid this pitfall, take the time to thoroughly till the soil, remove debris, and amend it with compost or topsoil as needed, creating a nutrient-rich and well-draining foundation for your sod.
Improper watering ranks are among the common mistakes that can impede sod establishment. Overwatering or underwatering can lead to issues such as root rot or dehydration. To mitigate this, water the newly laid sod deeply immediately after installation and maintain consistent moisture levels during the establishment period. Avoid excessive watering, which can drown the roots, and monitor soil moisture regularly.
Addressing soil compaction is crucial to fostering healthy root development. Compacted soil inhibits root penetration, restricts water and nutrient absorption, stunting sod growth. Aerating the soil before laying sod helps alleviate compaction and promotes healthy root development. Consider renting a core aerator or hiring a professional for larger areas when installing sod.
Incorrect sod installation techniques can hinder the success of your project. Poor practices, such as failing to stagger sod seams or leaving gaps between rolls, can result in uneven growth and unsightly patches. Follow proper sod installation techniques, including staggering seams, butting edges tightly together, and rolling the sod to ensure good root-to-soil contact.
Neglecting grading issues is another common mistake that can lead to problems such as water pooling, drainage issues, and uneven sod growth. Before laying sod, correct grading problems to ensure proper water runoff and prevent waterlogged areas. Use a leveling tool to smooth out uneven surfaces, creating an optimal environment for your sod to thrive. By avoiding these common mistakes and embracing meticulous planning, you set the stage for a successful sod installation that yields a healthy and visually appealing lawn.
How Much Does It Cost for Sod Installation
The cost of sod installation is a multifaceted consideration, influenced by several factors that collectively determine the overall expense of transforming a landscape with pre-grown grass. One primary determinant is the type of sod chosen, with different varieties commanding varying costs per square foot. Cold-tolerant types, for instance, might be slightly pricier but prove essential in climates like Canada, where harsh winters demand resilient grass varieties.
The size of the area is another critical cost for sod installation. Larger spaces naturally necessitate more sod, impacting both material and labor costs. Additionally, the state of the soil plays a role in the overall expense. Extensive soil preparation, including amendments and grading, can be added to the budget, ensuring a fertile and even foundation for the sod to thrive.
DIY sod installation is tempting due to labor costs that are required for covering tasks such as sod removal, soil preparation, and the actual laying of the sod. These costs vary based on location and the complexity of the job. Additional materials, such as fertilizers, soil amendments, and irrigation systems, also contribute to the overall expenditure. However, installing sod yourself can be challenging and cost more due to the cost to replace sod.
Accessibility to the installation site is another factor that can impact costs. The ease or difficulty of reaching the location affects the efficiency of the installation process, potentially influencing expenses.
Geographical location is a broader consideration, with regional differences in the cost of living and material availability influencing overall costs. DIY sod installation may appear cost-effective initially, as it eliminates labor expenses, but it's crucial to weigh this against the expertise required and potential mistakes that could incur additional costs. Professional installation ensures proper techniques, albeit with associated labor expenses.
Lastly, ongoing maintenance costs should be factored in sod installation costs. These include expenses for watering, fertilizing, and pest control, which contribute to the long-term investment in a healthy and vibrant sodded lawn.
Hydroseeding: A Modern Alternative to Sod Installation
What is hydroseeding? Hydroseeding, an innovative landscaping method, presents a compelling alternative to the conventional approach of installing sod. This technique involves spraying a slurry mixture containing seeds, mulch, fertilizer, and water directly onto the soil, offering several advantages, particularly in terms of cost-effectiveness.
- Hydroseeding accelerates the germination process for a quicker lawn establishment compared to traditional sod installation.
- The slurry mix creates an optimal environment for seed growth, enhancing the overall efficiency.
- Ensuring even distribution of seeds, hydroseeding minimizes patchiness and promotes consistent growth, a feature particularly beneficial when considering the cost to install sod traditionally.
- Suited for challenging terrains such as slopes and hard-to-reach areas where the cost of installing sod may be prohibitive or impractical.
- The slurry adheres well to the soil, preventing erosion and stabilizing surfaces, offering both cost and efficiency advantages.
- Hydroseeding is often more cost-effective than traditional sod installation methods, presenting potential savings in both material and labor costs.
- The efficiency in application and accelerated establishment contribute to an overall reduced cost to install sod alternatives.
- Utilizing eco-friendly mulch materials in the slurry, hydroseeding reduces the environmental impact compared to traditional sod installation.
- Lowering the risk of soil erosion and runoff, hydroseeding aligns with sustainable landscaping practices.
- Hydroseeding is adaptable to a range of climates across Canada, making it a versatile choice for landscaping projects in different regions, potentially addressing concerns tied to the cost of installing sod in harsh climates.
Maintenance Overview: Hydroseeded Lawns vs. Sod Lawns
Hydroseeded Lawns:
- Easier Watering Management: Hydroseeded lawn installation requires easier watering during initial stages, promoting gradual and efficient root development.
- Less Susceptibility to Immediate Weeds: Compared to sod, hydroseeded lawns experience fewer immediate weed issues, allowing for a more controlled and manageable environment.
- Gradual Mowing Initiation: Gentle care is needed for hydroseeded lawns, allowing for gradual mowing initiation without compromising the developing roots.
- Reduced Drying or Stress Risk: Hydroseeded lawns face a lower risk of drying or stress during the initial weeks, contributing to a healthier establishment.
- Lower Pest Infestation Risk: With reduced exposure to immediate pest issues, hydroseeded lawns demand less immediate attention to pest control.
- Lower Maintenance on Slopes: Erosion control measures in hydroseeded lawns reduce maintenance demands on slopes, ensuring stability and health.
Sod Lawns:
- Consistent Watering for Root Establishment: Sod installation requires consistent watering for root establishment, demanding careful management during the initial stages.
- Immediate Mowing Requirement: While sod establishes quickly, it demands immediate mowing, requiring vigilant care from the outset.
- Potential for Immediate Weed Challenges: Sod lawns may face immediate weed challenges, necessitating prompt attention to maintain a pristine appearance.
- Immediate Aesthetic Appeal: Sod provides immediate aesthetic appeal but requires vigilant care to preserve its beauty.
- Initial Fertilization for Rapid Growth: Sod lawns may require initial fertilization for rapid growth, adding to the immediate maintenance demands.
- Shared Long-Term Practices: Both hydroseeded and sod lawns converge on regular soil testing, integrated pest management, and aeration for long-term health.
Hydroseeded lawns showcase a notable advantage in terms of maintenance, particularly in watering, weed control, and mowing. While shared practices exist between hydroseeded and traditional sod lawns, the relative ease in these key aspects underscores the manageable nature of hydroseed lawn upkeep. Efficient watering, minimal weed intervention, and straightforward mowing contribute to a hassle-free maintenance routine. In order to see hydroseeding results flourish, in-depth post care post-care and maintenance guides are helpful and easy to follow.
Final Words
Whether rejuvenating an existing landscape or creating a new one, sod installation provides an accelerated solution for those seeking immediate and visually appealing results. With proper installation practices, sod serves as a rapid and effective method for achieving a lush, green lawn without the protracted wait associated with seed germination.
Sod Installation Essentials:
Ensure success in sod installation by addressing soil preparation, proper watering, and avoiding common mistakes. Focus on uniform coverage, soil aeration, and precise installation techniques. Consider the cost of installing sod, factoring in materials and labor, and explore cost-effective approaches to optimize your budget. Learn how to install sod efficiently with attention to watering schedules, grading correction, and post-installation care.
Hydroseeding as a Modern Alternative:
Explore the benefits of hydroseeding, such as faster establishment, uniform coverage, and adaptability to various terrains. It proves cost-effective, environmentally friendly, and suitable for diverse climates. Compare the cost of installing sod with hydroseeding for informed decision-making.
Explore Spray-on Grass Seed:
Consider the innovative option of spray-on grass seed for efficient and effective lawn establishment.